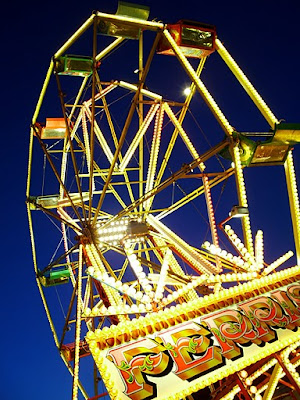
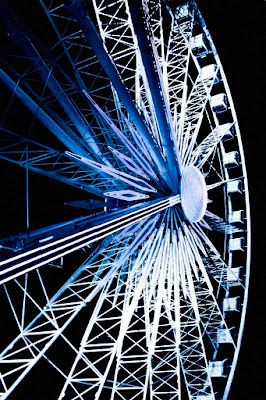
The GPN's firstNight Walk took place on Friday 23rd September in 2011, along London’s Embankment and led by Stephen McKenna.
The objectives for the night included an introduction to mastering photography in low light conditions and using slow shutter speeds to create motion blur and capture light trails. There was also an emphasis on different compositional approaches including landscape, abstract and enhanced creativity (eg. Jerk panning/overexposure etc.).
 |
| IMAX at Waterloo |
Based on issues and questions which arose during the course of the evening this photoblog provides a user's guide with a particular emphasis on helping members get to grips with the manual features of their cameras.
CAMERA SETTINGS – SHOOTING ON MANUAL
‘My camera’s very expensive and fully automatic: why would I bother with the manual settings?”
 |
| Cenotaph |
ISO: “What’s an ISO and can I get it on Ebay?”
Your ISO setting indicates the sensitivity at which an image is recorded on your camera’s sensor. Based on the scale originally applied for film stock you could think it of it being like a measure for different grains of sand paper. ISO 100 represents the finest, cleanest setting then raises in turns of coarseness through 200, 400, 800 on up to 1600 and beyond.
(Oh, and by the way, ISO stands for nothing more than International Standards Organisation. That is to say, it is simply an internationally applied and agreed measure of classification.)
(Oh, and by the way, ISO stands for nothing more than International Standards Organisation. That is to say, it is simply an internationally applied and agreed measure of classification.)
Ideally ISO 100 is best, especially for classic, postcard landscapes, but higher ISO settings will allow you to shoot with lower light levels and there will be occasions and settings for which some noise (grain) in the shot will add to its atmosphere. Imagine a shot of a dingy, rainy London street for example.
AP stands for Aperture Priority and this setting gives you control over the size of your hole! The aperture determines the amount of light you are allowing to enter the camera. Depending on the lens you’re using the aperture settings could typically range from f1.8 up to f22. Somewhat confusingly, the smaller the f number, the bigger the hole - the bigger the number, the smaller the whole.
“So, in dark conditions, I should use a smaller aperture setting to let in the most light?”
Not necessarily. You’ve a second way by which to control that – the length of the exposure which we’ll come on to shortly. Also, the aperture setting will also have an affect on the focal range you’ll achieve, usually referred to as the ‘depth of field’ or DOF.
Shooting at a high f value such as f22 will provide a greater depth of field. That is, providing an equal sharpness for objects close and far, such as you might want for a boat on a lake with range of mountains in the background, or maybe on a cityscape shot. At the other end of the scale, around the f2s, you’ll get a very narrow depth of field. Imagine a classy portrait shot, sharpest on the eyes, soft on the hair and the background all of a blur, or perhaps a close-up on the taxi sign on a black cab with a blur of nightlights in the background.
Your camera works on the basis of allowing light to fall on a sensor for a set period of time. This is achieved by means of a shutter covering the aperture which can be momentarily released. In very bright conditions this could typically be for just a thousandth of a second, however for night shooting, or indoor work, that interval becomes much longer and can be a second to, say, fifteen seconds, or even longer.
The duration that’s required to take a sufficiently exposed shot is determined by the aperture you’ve selected and your in-camera metering should indicate the required speed of release.
 |
| Office Interiors |
Well, while you’re in the pub look back at your pictures in display mode and you’ll be able to see the settings that you chose for each shot. That shot that’s too dark – note the exposure time, same with the over-exposed shot and give some thought to how you might have adjusted those settings to get a better result .
Remember, that each location and setting will create its own demands and with repeated experimentation you’ll become familiar with the requirements of a night shoot. It won’t be simple at first, but stick with it.
TROUBLESHOOTING:
"My camera’s fcuked! The auto-focus isn't working!!”
TROUBLESHOOTING:
"My camera’s fcuked! The auto-focus isn't working!!”
Sometimes in low light conditions the auto-focus is unable to ‘see’ what you are trying to focus on. One solution is to find a point in the picture at a similar distance that it can find, let it focus on that, and then recompose your shot accordingly. Alternatively, just focus manually. Not always easy in the dark so you may want to try a test shot, then enlarge it and see if you’re on the mark.
"What are these coloured spots on my pictures?"
The problem here is lens flare. Despite the low light conditions of night shooting it is possible that you will experience some degree of flare from time to time. A tulip head or lens hood will minimise that possibility, but it still may be an issue from time to time and a dark background will make such spots more conspicuous. It may be that you will have to resort to eliminating by retouching.
"I've put my camera on Ebay. All my nightshots are blurred. Grrrr!"
Handheld photography at night is achieveable (sometimes!), but there are situations which, unavoidably, will require the kind of exposure time that'll defeat even the steadiest of hands. So, take the camera off Ebay and check out what offers they have on tripods. It needn't cost you much at all and will really make the difference to your night shots.
THE RIGHT KIT – “What kind of kit is best for night shoots?”
Wide-angle lens – best for broad panorama, soaring edifices etc.
Shutter release cable – much handier than a camera’s timer and essential in avoiding camera shake.
Tripod / mini-tripod – not compulsorary but strongly recommended for the best results.
Small torch – it’s dark out there! Really, useful if you’re rummaging in the old bag for stuff.
Apropriate clothing – you might be out for a couple of hours, standing around, so you’ll get cold easily. Also a reflector belt or hi-vis clothing is a good idea.
BE SAFETY CONSCIOUS
It's still dark out there, so, always pay attention to your surroundings. Watch your footing and check for any unseen hazards (that's where the torch comes in). It's also easy to switch off and become absorbed in your picture taking, so if you're shooting near a busy road, or sat on a traffic island, or such, be switched on to potential hazards around you and be sure you're visible (hence the hi-vis jacket).
Bear in mind, also, your personal security. Be aware of passers-by and always keep your kit close by, preferably in front of you rather than behind you.
CONCLUSION
Nightime shooting can be a very rewarding experience. There’s something special about going out after dark when there are fewer people about and fewer visual distractions; and with the magical quality of the city lights at night you’ll be able to capture some very special shots. So, wrap up warm and stick at it.
But before you go, step into the Night Gallery for some further reflections on shooting after sundown.
"Westminster Dusk" (above): This twilight shot is helped by a moody presence of cloud hanging over Westminster while some subtle burning (darkening) has accented the sense of drama. The sky hue has been achieved using the 'split toning' facility in Lightroom with magenta assigned the highlights and some blue to the shadows.
"Waterloo Trails" (below) : The secret to good motion blur and traffic trail shots is in the timing. Your exposure does not have to be very long, but the important things is to get good action in the shot. In the image below I was sat on a traffic island at the end of Waterloo Bridge and my target was to get a bus cornering the roundabout. There was no shortage of them but the challenge was in firing the camera just ahead of the bus coming into shot. Sometimes though a bus passed either too close or too far. Eventually, on about the fifth shot I captured what I was after. A tripod was essential in capturing this image with a remote switch to avoid any camera shake. Settings were: ISO 100 - Ap f22 - Exp: 6".
"Peninsular Gasholder" (below): Choice Shooting Times - Twilight is a great time for night shots when there is still some light in the sky. Complete darkness is never very photogenic and this shot would not have had nearly as much presenence without the waning twilight sky behind it; and even better with some lingering clouds to add interest. Settings: ISO 100 - Ap f22 - Exp: 0.8 secs.


